
Snowflake
Snowflake is the one connector with two credential shapes, picked by auth method: password (a service user’s password) or keypair (an RSA key pair, so there’s no password to rotate). Use keypair for a new service user: Snowflake is retiring password auth. Either way, connecting is the same two moves: test the credentials, then create the data source. Pick the surface you’re working from.
Connect from the web app
Section titled “Connect from the web app”In the app, a data source is added from inside the pack it will feed. Open the pack first, then work through the Connect a source wizard.
-
Choose a source
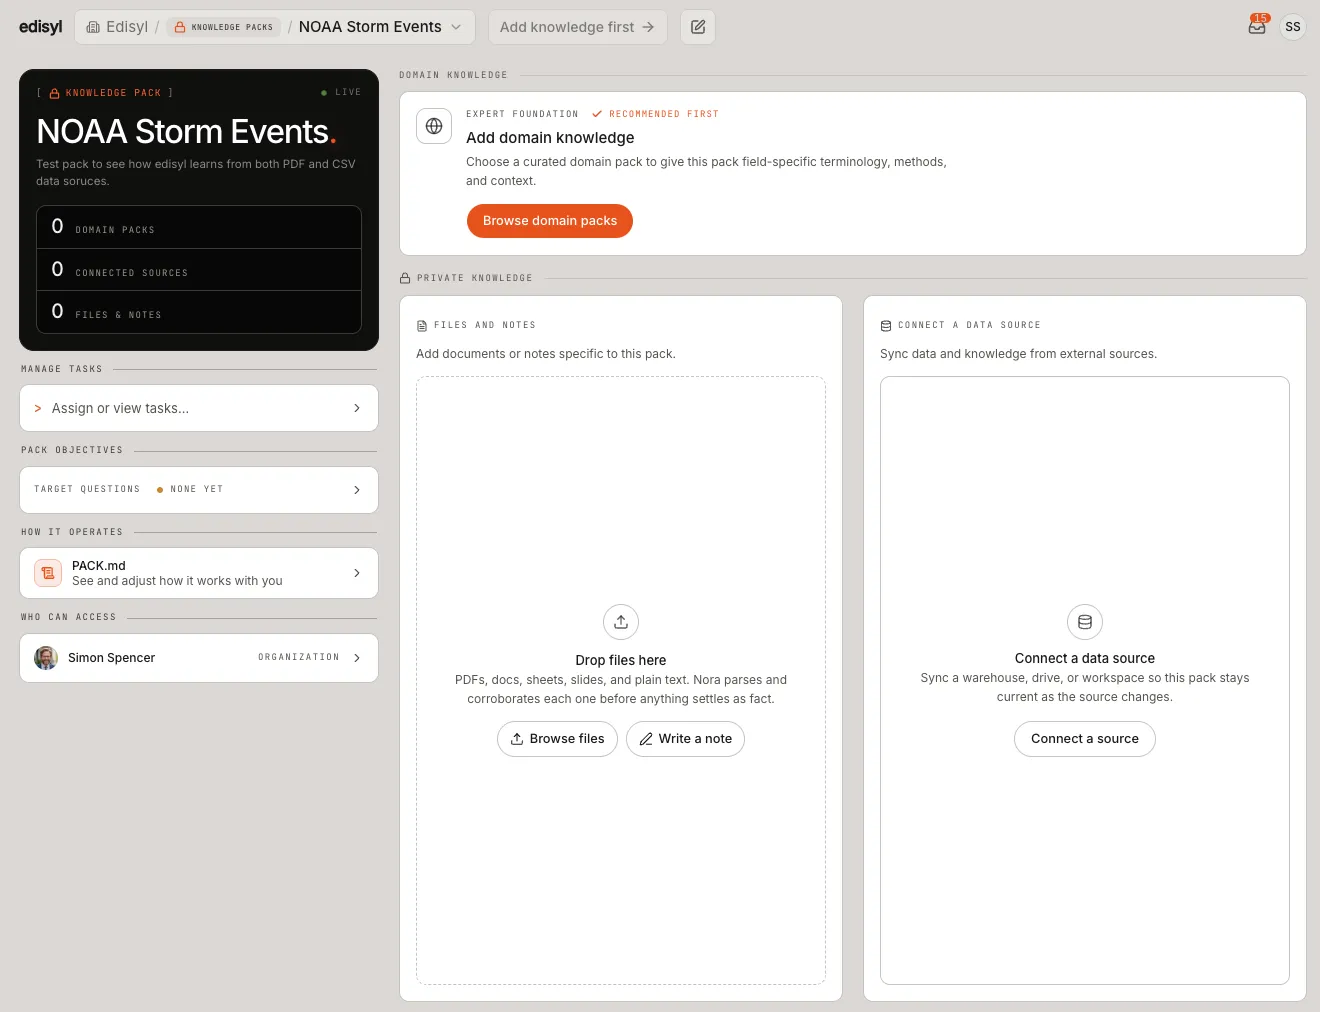
Section titled “Choose a source”On the pack page, under Private knowledge, find the Connect a data source card and click Connect a source.
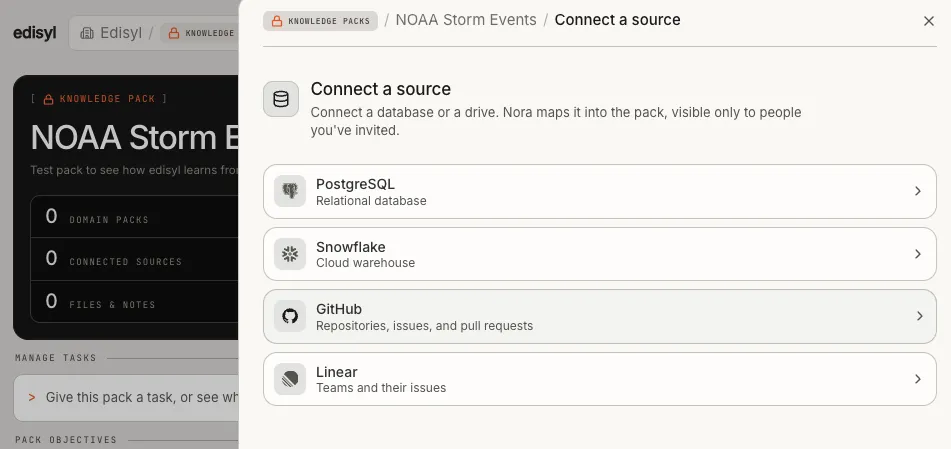
Pick Snowflake from the list of sources.
-
Add credentials
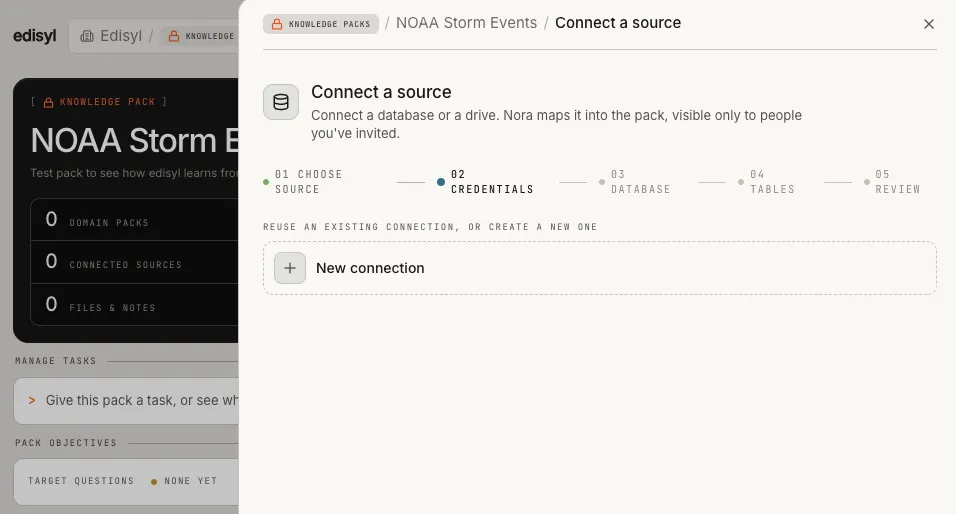
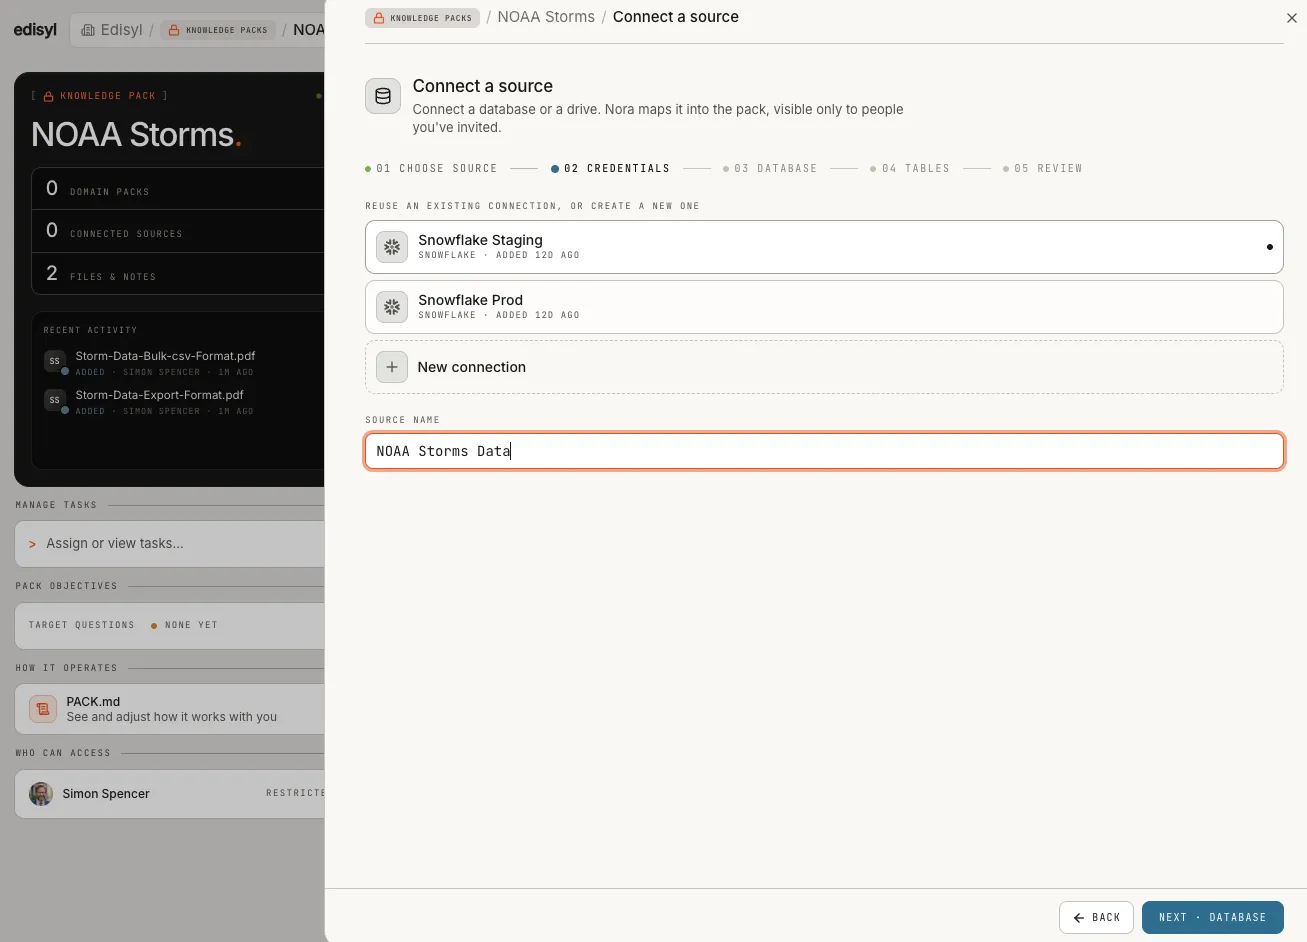
Section titled “Add credentials”On the 02 Credentials step, click New connection (or pick an existing one if this account is already stored, see Reusable connections).
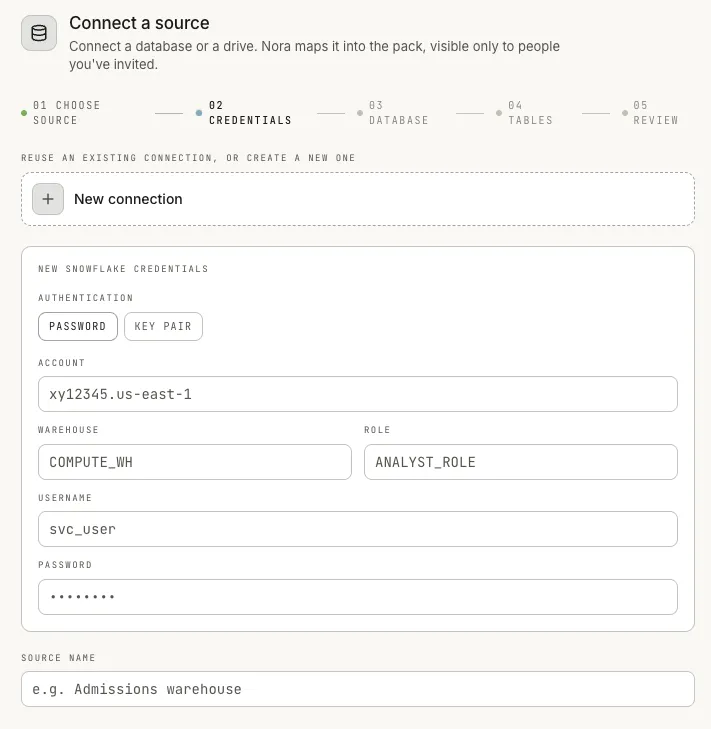
Under Authentication, choose Password or Key pair, then fill in the fields required by both. The values shown in the form are placeholders; replace them with your own:
- Account: your Snowflake account identifier, in the form
<org>-<account>or<locator>.<region> - Warehouse: the warehouse edisyl’s queries will run on
- Role: the role the connecting user assumes
- Username: the user edisyl connects as
Enter the service user’s Password.
Paste the PEM-formatted Private key. Its public half must already be registered on the Snowflake user (
ALTER USER ... SET RSA_PUBLIC_KEY). Fill in Private key passphrase only if the key itself is encrypted.Don’t have a key pair yet? Snowflake’s Key-pair authentication guide walks through generating the private and public keys and assigning the public key to the user.
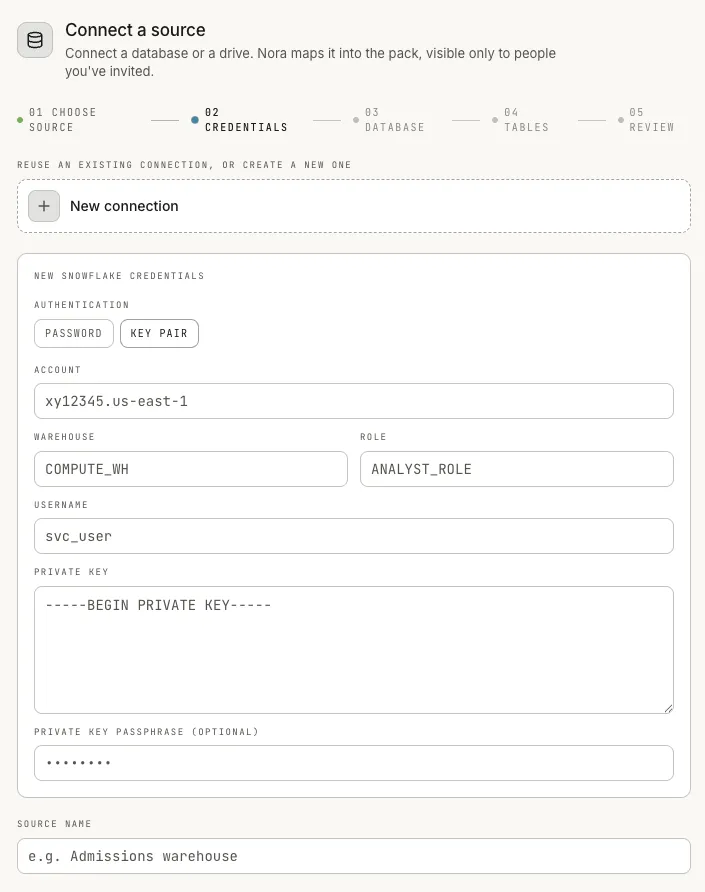
Give it a Source name and click Next · Database. When you’re creating a new connection, keep the name generic, like “Snowflake Production”: once connected, every database this user can see in the account becomes available through it, so a name tied to one database or team will be wrong as soon as you mount a second one.
If the account is already stored, pick the existing connection from the list instead of filling in credentials again. In that case the name only labels this one source, so name it for the data it holds.
- Account: your Snowflake account identifier, in the form
-
Pick the database and schema
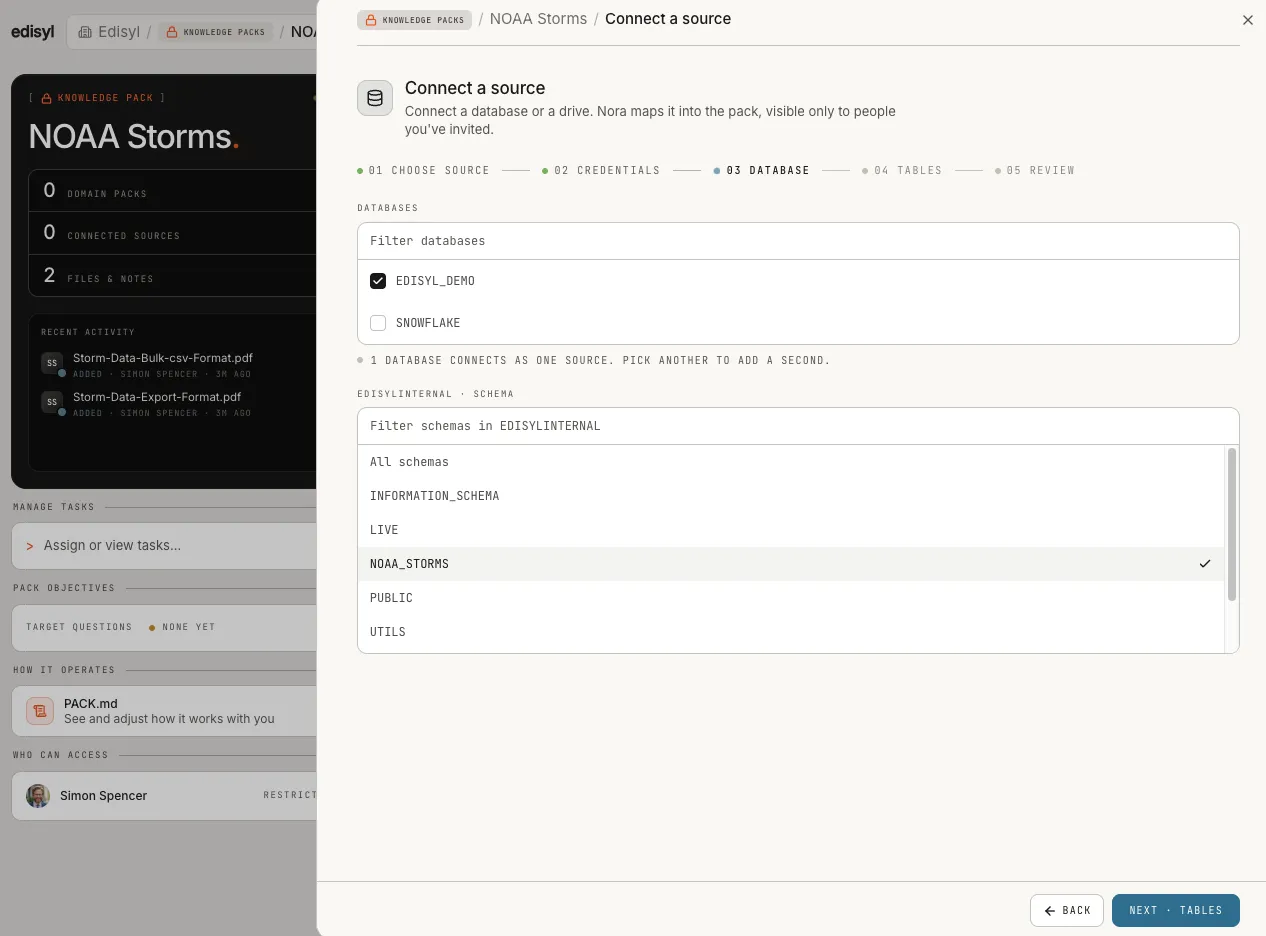
Section titled “Pick the database and schema”On 03 Database, tick the database to mount. One database connects as one source; ticking another adds a second source. Below it, choose All schemas or a single schema to narrow what gets imported. Click Next · Tables.
-
Choose tables
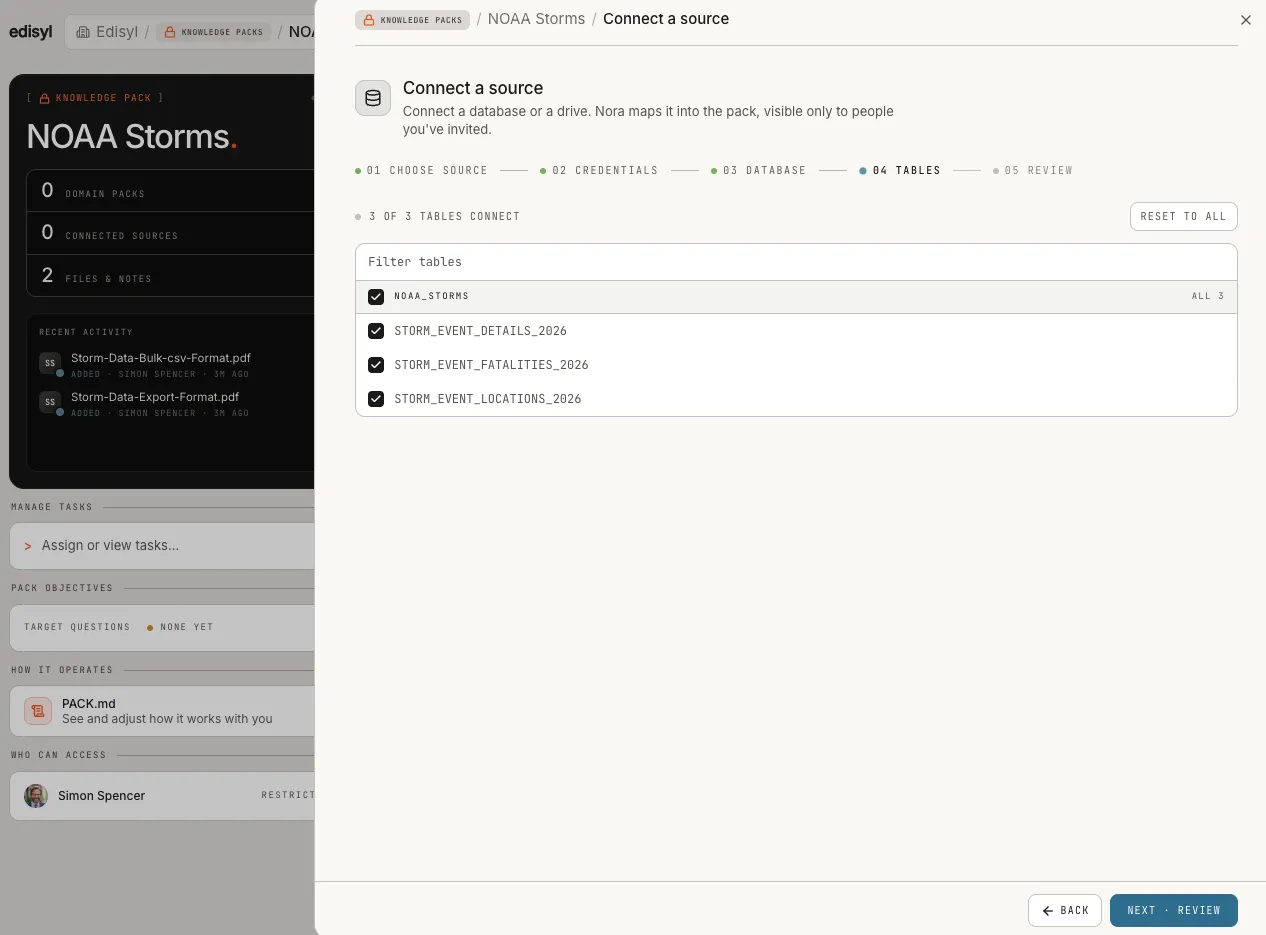
Section titled “Choose tables”On 04 Tables, every table in the chosen scope is selected by default. Untick the ones this pack doesn’t need, or use the filter to find specific tables. Reset to all brings everything back. Click Next · Review.
-
Review, test, and connect
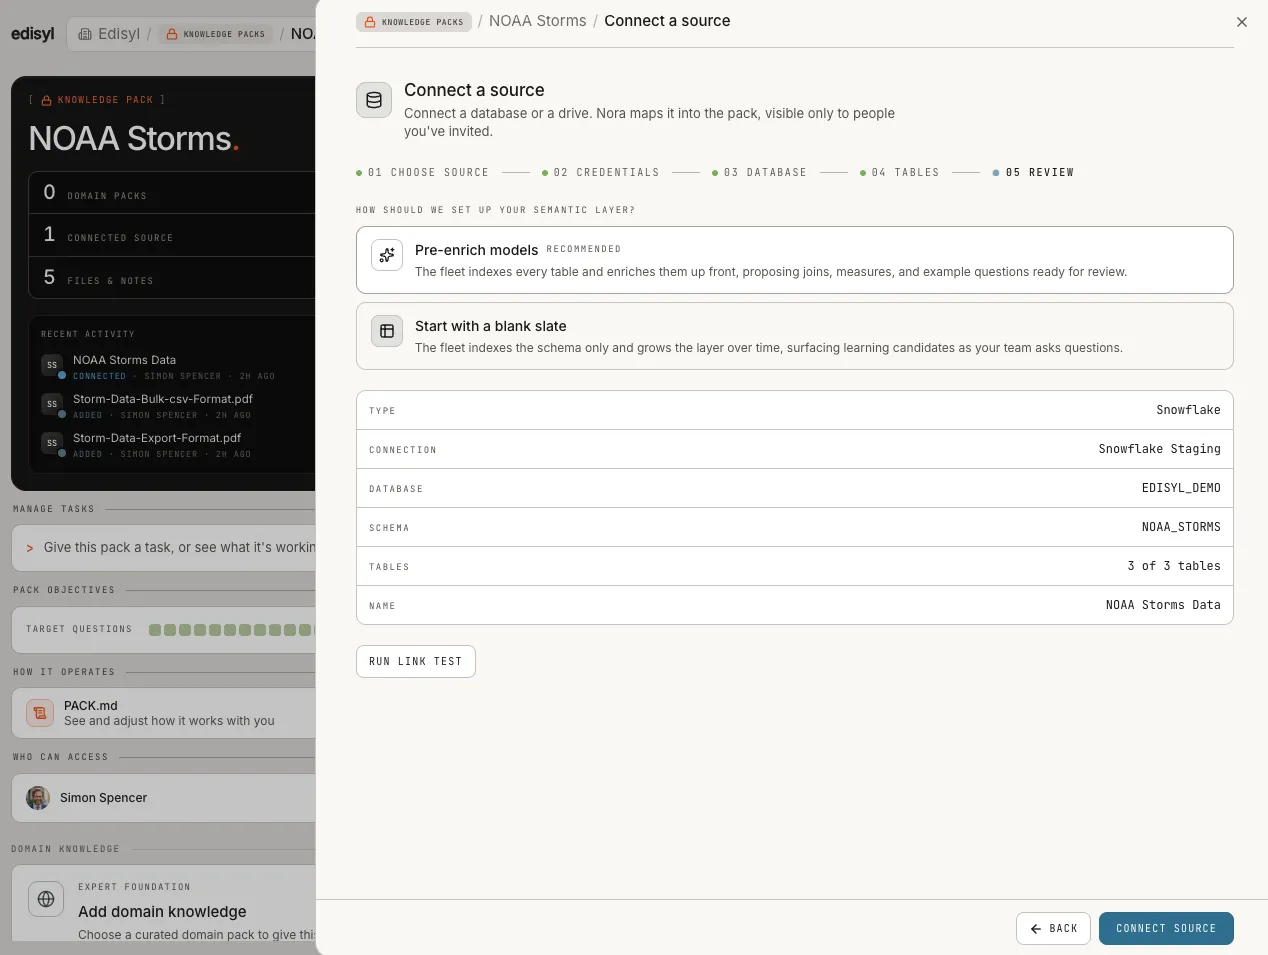
Section titled “Review, test, and connect”On 05 Review, pick one of two starting points:
- Pre-enrich models (recommended): every selected table is indexed and enriched up front, proposing joins, measures, and example questions for you to review.
- Start with a blank slate: only the schema is indexed. The semantic layer grows over time as your team asks questions and learning candidates surface.
Not sure which? Semantic layer: pre-enrich or blank slate explains what each one does and when to pick it.
Check the summary (type, connection, database, schema, tables, name), then click Run link test to confirm the credentials reach the database before committing. A failure names the actual problem so you can go back and fix it. Finally, click Connect source. Table discovery and the first import start immediately, and the source appears under the pack’s Connected sources.
Connect from the CLI
Section titled “Connect from the CLI”-
Validate credentials
Section titled “Validate credentials”Test the config before anything is saved:
Terminal window edisyl data-sources test-connection --type snowflake --config-file sf.jsonsf.json {"authMethod": "password","account": "xy12345.us-east-1","warehouse": "COMPUTE_WH","role": "ANALYST","username": "svc_edisyl","password": "..."}sf.json {"authMethod": "keypair","account": "xy12345.us-east-1","warehouse": "COMPUTE_WH","role": "ANALYST","username": "svc_edisyl","privateKey": "-----BEGIN PRIVATE KEY-----\n...\n-----END PRIVATE KEY-----\n"}The key’s public half must already be registered on the Snowflake user (
ALTER USER ... SET RSA_PUBLIC_KEY). Add"privateKeyPassphrase"only when the key itself is encrypted. To generate a key pair, follow Snowflake’s Key-pair authentication guide.A success returns
{ success: true, durationMs }. A failure returnssuccess: falsewith a human-readablemessagenaming the actual problem. The CLI only checks that the JSON is non-empty; the shape itself is validated server-side. -
Create the data source
Section titled “Create the data source”This auto-creates a pack from the source name (pass
--pack-idto attach to an existing one instead).Terminal window DS=$(edisyl data-sources create --name "Snowflake prod" --type snowflake \--config-file sf.json --database PROD -j | jq -r '.id') -
Enrich it
Section titled “Enrich it”creatediscovers the tables and imports them by name.enrichlearns what the columns mean and how the tables join, and it never runs on its own. Until it finishes, questions about the data are declined. It can take up to an hour.Terminal window edisyl data-sources enrich "$DS"edisyl action watch <action-id> -
Find your new pack
Section titled “Find your new pack”Terminal window edisyl pack list
Config reference
Section titled “Config reference”The same fields back both surfaces. In the web app they’re form inputs; in the CLI they’re keys in the config JSON.
| Field | Required | Notes |
|---|---|---|
authMethod |
Yes | password or keypair |
account |
Yes | Account identifier, e.g. xy12345.us-east-1 |
warehouse |
Yes | |
role |
Yes | |
username |
Yes | |
password |
Only for authMethod: password |
|
privateKey |
Only for authMethod: keypair |
PEM-formatted PKCS#8 private key; its public half is registered on the Snowflake user. See Snowflake’s key-pair guide |
privateKeyPassphrase |
No | Only when the private key itself is encrypted |
The database is not part of the config. It’s chosen separately when you create the data source (the 03 Database step in the app, --database in the CLI), so one set of credentials can back several databases. See Reusable connections.
Next: Teach & ask, or Reusable connections if this account backs more than one database.
Was this page helpful?
Thanks for the feedback.